|
|
|
| This document is available in: English Castellano Deutsch Francais Nederlands Portugues Russian Turkce Arabic |
![[Photo of the author]](../../common/images/Andre-Pascual.jpg)
by André Pascual <apascual(at)club-internet.fr> About the author: Originally an draughtsman, and now a teacher for manufacturing
technology, specifically CAD. Translated to English by: Scott Rutherford (homepage) Content: |
![[Illustration]](../../common/images/illustration99.gif)
Abstract:
The tutorials "Pseudo 3D" and "Effects of fire" caused me to receive many emails, for the large part because of the difficulty of the proposed exercises. In fact, it was only a matter of difficulty for beginners. The experienced Linux user is not stopped by a missing font or pattern: he would soon install the fonts, or find a suitable path for saving, that wasn't the case with my correspondents. Everybody has been a beginner, and who still isn't in some area of Linux? So this article is aimed at the beginner, although even the purists won't be offended by the methods described.
Mandrake 8.0 and The Gimp 1.2.1 served as the reference packages
for this article. If using different versions, directory structure,
indexes or drop down menus may be different from those stated in
this text. Should this be the case, adaptation to the specific
configuration will be required.
When discussing printed characters, I shall use the terms fonts and
styles completely interchangeably. Fill patterns shall be referred
to as either patterns or motifs. Instead of referring to XFree86,
the official name, I shall say simply X.
Similarly when referring to the Midnight Commander, which allows
the management of files without in depth knowledge of the base
functions of Linux and their plethora of options, I shall say MC.
Users of Norton Commander and Xtree Gold under DOS, or WinCommander
under Windows will find themselves on familiar territory. Right up
to the function buttons which have the same allocations in MC as in
WinCommander! Remember to be pragmatic. It is without doubt better
to do something functional and clumsy than something sophisticated
and non-functional.
The script-fu's from Gimp use by default fonts that the different distributions may not install automatically. These fonts come in two packages: Freefont and Sharefont. The former is free, and the later is distributed under the shareware licence, but both are very interesting. Without a doubt they make a great difference to the presentation abilities of X.
![[Figure 1]](../../common/images/article116/fig1_t1.jpg)
These two packages are available in .tgz archives thanks to Christoph Lameter at the
following address:
Several sites on the internet (e.g http://ibiblio.org/pub/Linux/X11/fonts/,
ibiblio was formerly known as metalab or sunsite), and you can
sometimes get them on the CD's found on the covers on magazines.
Linux Magazine France number 9 provides them in a directory of it's
accompanying CD, called /Gimp/fonts.
Taking this as an example, the fonts can be installed as
follows:
If this option is not on the menu, exit MC (F10), the cursor
still pointing at the window containing the copied files. If you
then take the trouble to add the following line to .bashrc:
mc () MC=`/usr/bin/mc -P "$@"`; [ -n "$MC" ] && cd
    "$MC"; unset MC ;
you will find yourself in the selected directory. If not, go there
using
cd /usr/X11R6/lib/X11/fonts
and then decompress directly using:
tar xvfz *.tgz
This leaves you with two new directories, one called: freefont
and the other called: sharefont. The .tgz archives can now be
deleted.
Freefont contains 79 fonts, nearly all usable, and Sharefont
contains 22.
![[Figure 2]](../../common/images/article116/fig2_t1.jpg)
Each directory also includes a special file called fonts.dir,
which describes the characteristics of each font to X. This means
that you don't need to run mkfontdir to generate this file.
The fonts will be loaded by X the next time it is launched, but
only if you first tell it that it needs to use them. In older
distributions you had to add the following lines to
/etc/X11/XF86Config, in the section labelled "Files":
FontPath "/usr/X11R6/lib/X11/fonts/freefont" However in Mandrake 8.0 a font server is used. To add the
fonts to the font server path using the chkfontpath utility:
FontPath "/usr/X11R6/lib/X11/fonts/sharefont"
chkfontpath --add /usr/X11R6/lib/X11/fonts/freefont/
chkfontpath --add /usr/X11R6/lib/X11/fonts/sharefont/
Restart the font server:
/etc/rc.d/init.d/xfs restart
If you are in graphical mode, and not in console mode, the
instructions above are still valid if entered into a terminal
(rxvt, kvt, wmterm...). However the fonts will not be available
immediately; they will not be loaded without restarting X, or
entering the following commands into the still open terminal:
xset fp+ /usr/X11R6/lib/X11/fonts/freefont

    xset fp rehash

    xset fp+ /usr/X11R6/lib/X11/fonts/sharefont

    Xset fp rehash
In order to check that the fonts have been loaded run
xlsfonts | egrep 'sharefont|freefont'
or launch xfontsel, or simply the KDE font manager.
The fonts are now usable by all (well not really) X
applications.
The fonts can be gathered into a table, like in this article, by
using Gimp with the following commands:
xtns> Script-Fu> Utils> Font Map.
Important: it's a merciless tool. One error when entering the name
of a font and you will be sent back to start again. The best way
round this is to work with the KDE font manager open at the same
time as the Gimp. That way you can see the name of the font in the
manager at the same time as seeing it in the sample field. Figure 3
shows several of these fonts, which are useful for creating
whimsical logos or reference letters.
![[Figure 3]](../../common/images/article116/fig3_t1.jpg)
These newly installed fonts are interesting, but maybe you have
a Windows partition on the hard drive, with it's legions of
beautifully crafted True Type fonts? If you don't have windows then
you can as well download True Type fonts from various sites on the
net such as http://hugemcgriffin.com/fonts/a/,
http://www.fontguy.com/, http://www.freepcfonts.com/index.html,
... It's possible to use them.
The latest Linux distributions, and those still to come, naturally
envisage their use. It is not the same in older distributions, like
Mandrake 5.3
That said, a least a solution exists. It comes in the form of a
server called Xfstt (a simple executable file of a round 130 Kb
after compilation) available at the following address (among
others): ftp://sunsite.unc.edu/pub/Linux/X11/fonts/.
The archive you want is called Xfstt-0.9.10.tgz (or the latest
version) and is around 80Kb. The version numbers show that the
program is still under development, but it functions without any
major problems.
Before compiling, it is necessary to prepare the terrain by
creating a directory to receive the True Type fonts, such as
/usr/share/fonts/truetype/ (mkdir /usr/share/fonts/truetype/ or F7
in MC). Then, copy the required fonts into this directory, or
create a symbolic link (F9 in MC, followed by File then Symlink)
pointing towards the Fonts directory under Windows. In my setup,
/usr/share/fonts/truetype/ contains the link winfonts which points
towards /mnt/Win98/windows/fonts, where /mnt/Win98 is the mount
point of my windows partition.
The compilation of the program can now begin; to do this change to
the directory created by decompressing the archive (/tmp/xfstt0910)
and execute the following commands: make xfstt &&
make install When the compilation has finished, the executable binary
xfstt will be installed in /usr/X11R6/bin. It remains
now to tell the server xfstt which fonts it will be using. Execute
the command:
xfstt --sync --dir /usr/share/fonts/truetype
This will have the effect of creating two description files in
/usr/share/fonts/truetype called
ttinfo.dir and ttname.dir.
The server is launched by using the command: xfstt --dir
/usr/share/fonts/truetype &.
However on execution, it will appear that nothing has happened:
these fonts are only available to X, not in text mode, and if you
are in X then it will be necessary to tell X to load them. This can
be achieved by entering the following command:
xset +fp unix/:7100
Afterwards verify with "xlsfonts | grep ttf-" or xfontsel or the
KDE font manager that the TrueType fonts are available; they should
be usable by all (well nearly) applications that run under X.
StarOffice5 allows their use in StarDraw, StarImpress, StarCalc,
but strangely not in StarWriter, perhaps there is an option to
activate it, but if so I couldn't find it. In any case, they are
usable in the Gimp as you can see in figure 4. There is as well a
freefont plugin for Gimp. If you have this plugin installed then
you have yet another method to use TrueType fonts in Gimp. Unlinke
the xfstt server the freefont plugin makes of course the fonts not
generally available to all applications.
![[Figure 4]](../../common/images/article116/fig4_t1.jpg)
#!/bin/sh
xfstt --sync --dir /usr/share/fonts/truetype
xfstt &
xfstt +fp unix/:7100
And the second contains simply:
#!/bin/sh
xset -fp unix/:7100
This is the solution I use: it works.
The patterns (images) are nothing more than image bitmap files in the .pat format specific (but not actually copyrighted) to the Gimp, which are used to fill a surface with the aid of the "paint pot" tool. They are saved in the directory /usr/share/gimp/1.2/patterns/. Any further patterns created can be saved in this place, which will give all other users access, or in your home directory at ~/.gimp/patterns, in which case only you will be able to use these fonts.
Suppose that we wanted to use the image in figure 5 to "paper" the background of an image.
![[Figure 5]](../../common/images/article116/fig5_t1.jpg)
We could do it manually be coping and pasting but that is a bit
longwinded and not very precise: the patterns will be moved to the
nearest pixel! It is better to let the Gimp do it, and it will if
the file to be repeated is of the right format, i.e. a .pat
file.
If this is not the case, you can remidy it as follows:
Quit the Gimp, since the new pattern will be available on
restarting, and re-launch it.
In the tool box, click on File>Dialogs>Patterns. The Patterns
Selection box appears and shows samples of all the available
patterns; if you click on a sample, that one will be enlarged
temporarily. Also, clicking on a sample selects the current
pattern.
Find the pattern Tuxdor, near the end of the list, as the patterns
are listed alphabetically and select it for use.
Create a new workspace with File>New>Width 288 Height 286
(space for 4 patterns)
double click on Fill with a colour or pattern (the paint pot) and
select Pattern Fill.
Click anywhere on the empty image and it will be filled by the
golden Tuxdor:
![[Figure 6]](../../common/images/article116/fig6_t1.jpg)
However the filling is not very aesthetically pleasing: the
"seams" between the patterns are visible. This comes from the
pattern itself, which wasn't created to enable tiling like this.
Lets change that. Reopen the original figure 5. Right click on the
image then
>Filters> Map> Make Seamless, we get a new image.
![[Figure 7]](../../common/images/article116/fig7_t1.jpg)
Save this in the same place as Tux2.pat, with the identifier TuxTile. Quit the Gimp, re-launch, and make a new image of 432x392 pixels. Fill this new image with the TuxTile pattern. Now we have a new image without seams, but looking a little military (of course that has it's place depending on the destination of the pattern). However the quality of the image is much better than the previous one.
![[Figure 8]](../../common/images/article116/fig8_t1.jpg)
All the same one could want a softer image, more melded. In order to make an adequate pattern:
![[Figure 9]](../../common/images/article116/fig9_t1.jpg)
![[Figure 10]](../../common/images/article116/fig10_t1.jpg)
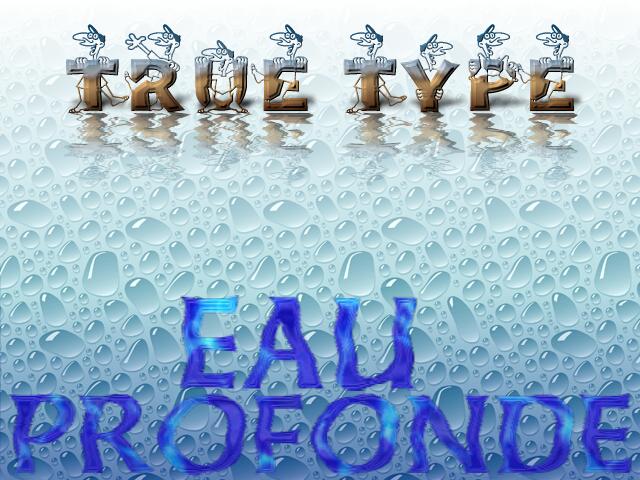
The final image shows what you can do with these charcter fonts, and the patterns other than those that come with the Gimp. The text was created using the Script-Fu logo; for sure it took some work to get it to look like that, but the same thing could be achieved by anybody. It is sufficient to explore the numerous possibilities the software offers, and to amuse yourself with them.
|
|
Webpages maintained by the LinuxFocus Editor team
© André Pascual, FDL LinuxFocus.org Click here to report a fault or send a comment to LinuxFocus |
Translation information:
|
2001-11-01, generated by lfparser version 2.21