|
|
|
| This document is available in: English Castellano ChineseGB Deutsch Francais Russian Turkce |

by Jonás Alvarez <jalvarez(at)eitb.com> About the author: Jonás Alvarez has worked as aplication developer in UNIX and Windows environments for several years. Among other things, he has given several O.S., Networks and Development Courses. Translated to English by: Miguel Alfageme Sánchez, Samuel Landete Benavente. <mas20(at)tid.es> Content: |
Gambas: Basic for Linux
Abstract:
Gambas is one of the currently available Basics for Linux. In this article we'll develop an example where we can see how simple and powerful Gambas for daily tasks is. |
One of the most extended and easiest programming languages, mainly for the newbies, is Basic. Until now the most common environment for Basic application development was the Microsoft Visual Basic IDE. Lately the use of the Linux is spreading towards the user desktop. From being limited to servers and being used by gurus, it is becoming an OS for the client computers, giving an answer to needs such as reading electronic mail, surfing the web and text editing. Following this trend several BASIC development environments are now available. Gambas is the one we'll see in this article, a graphical environment for Basic development. With a programming style similar to the Visual Basic's, as we'll see later, it has its differences too. The version I will use is 0.64a, included in my SuSE 9.0 distribution. While writting these lines, we can see on the project page of gambas that the last version is 0.81, but this should not affect this article.
As a developer of Visual Basic applications for a time, I didn't need much more than just start to work to develop this example. Besides, it's the first time I touch Gambas, what proves that for anyone who has ever used Visual Basic can use it. For the rest, it can be an example of how simple Basic can be useful for many things.
Because I like learning by doing, we will start with an example. It is a very simple application which has a stopwatch with a countdown on the screen. We can change the time, stop it and start it when we wish to do so.
Just after starting Gambas we'll meet its assistant:
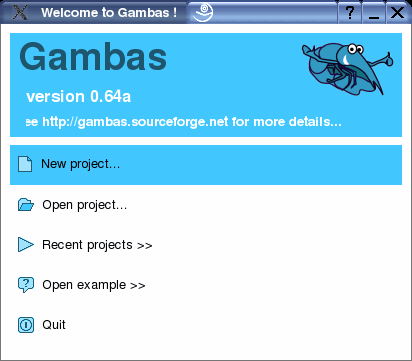
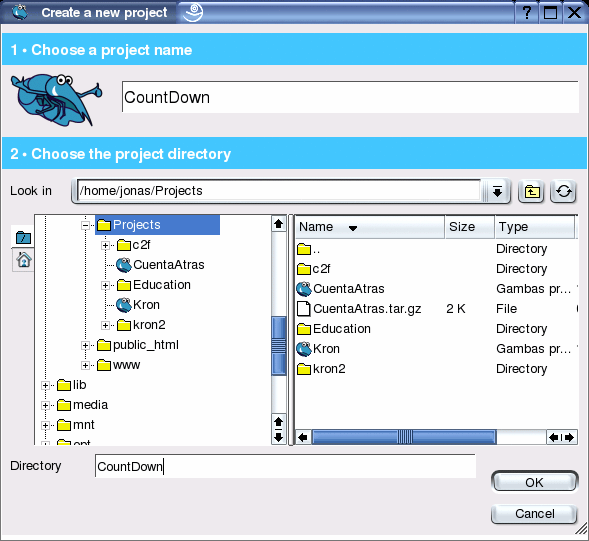
We choose New Project. In the next window we are asked for the Project Name. Our project will be called CountDown. On the Second Dialog we must choose the project directory. We select our working directory, and in the text box on the bottom, we write the directory name that we are going to create.
If it is the first time we start Gambas or if we haven't deactivated the option, we'll see the Tip of the day. We read what interests us and we close the window. We already are in the environment, ready to work. We can see several windows on our desktop. If we are in an environment such as KDE, with several desktops, we might be interested in dedicating one of them to Gambas, thus having all its windows under control. Personally one of the first options I usually activate in KDE is that each desktop only shows its own icons.
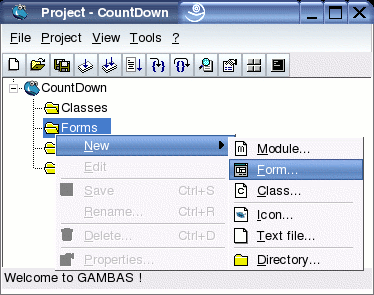
We are going to create the main form of the application. For this, we do a right click in any part of the project window and create a new form.
In the dialog we indicate the form name, in this case FCountDown, with all the values left on their default.

We already have our first form, which is empty for the time being.

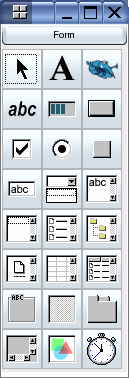
Here we will include the controls our stopwatch will have. We click on the toolbar elements we'll include in our form. We can see its name if we pass the mouse above each control. With a double click the control will be placed in the top left part of the form. With a single click we'll place it, changing its size, in the part of the form we want. For our program we are goint to need a Label, a TextBox, a Timer, two Buttons and a ToggleButton.
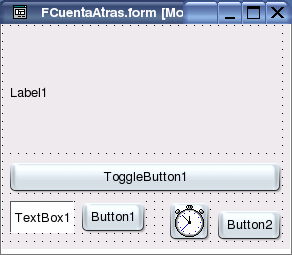
Once all the controls are in place, we must have something similar to this (more or less, each one can put what he wants):
Once we have the controls in our form, we change their names to something that has a meaning for us. For this, we edit the Name property on the Property sheet. If we can't see the Properties sheet on the screen we can activate it from the project window with the property button. To search it we can move the mouse above the buttons in order to locate the one we want.
I name the Label1 control as lblContador: I click the control and next I can change its name in the Property Sheet. For this, I edit the Name property and assign lblContador as its value. After this I change its font type to bigger one . For this, in the button ... in its font property I choose the Courier Bold 72 font type and Accept (OK). In the same way, I change the ToggleButton1 name to tglFuncionando. TextBox1 control becomes txtSegundos, Timer1 control becomes clkMiReloj, Button1 becomes cmdPonerSegundos and at last I rename Button2 to cmdSalir. Besides I change the Alignment of txtSegundos to Right.
And we start with the Basic code. It's very simple and not very strict with the sintax. What we'll do first is change the texts we see in the form to more real values. Although many of the options are being changed from Basic, we could have done it in each of the control's property sheet, with any of both options we would get the same result.
As soon as the form opens we fill the titles we want each control to have. When we say as soon as the form opens we are talking about managing an event: the opening of the form. For this we double click in a part of our form that hasn't any control. An edit window opens and the cursor is located inside a new procedure: Public Sub Form_Open() (if we have programmed before in Visual Basic, we would use the Form_Load event). We are going to make the lblContador control to present the remaining seconds of the countdown. The first lines of code of the from class look as follows:
' Gambas class file
CONST fSegundosPorDefecto AS Float=120.0
fSegundos AS Float

PRIVATE SUB VerValores()
  DIM nMinutos AS Integer

  nMinutos = Int(Int(fSegundos) / 60)
  lblContador.Caption = nMinutos & ":" & Format (fSegundos -
                                                nMinutos * 60, "00.0")
END

PRIVATE SUB VerActivarDesactivar()
  IF tglFuncionando.Value THEN
    tglFuncionando.Text = ("&Detener")
  ELSE
    tglFuncionando.Text = ("&Arrancar")
  ENDIF
END

PUBLIC SUB Form_Open()
  fSegundos = fSegundosPorDefecto
  VerValores
  tglFuncionando.Value = FALSE
  VerActivarDesactivar
  txtSegundos.Text = fSegundos
  cmdPonerSegundos.Text = ("&Reiniciar")
  cmdSalir.Text = ("&Salir")
END
We have added just after the comment Gambas had generated, ' Gambas class file, a constant that holds the number of seconds by default for the countdown, fSegundosPorDefecto, with a value of 120 seconds (two minutes), and a variable, fSegundos which is going to hold the countdown. We have created two procedures too: VerValores, which visualizes the countdown values and VerActivarDesactivar, which changes the text of the Start/Stop button.
At this moment we already have a form that works. It doesn't do anything useful, apart from makeing us understand what we have done until now, so it's worth a try. We save the changes from the main window of the project, Project CountDown, and launch the application with F5, or with the Execute button of the button bar of the same window. This is what we should see:
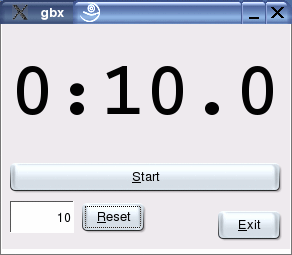
If this doesn't appear or we receive any error, we must review what we have done until now. Even though we push Start, Reset or Exit nothing happens. This will be our next task: assign events to this buttons in such a way that, when the user pushes any of them, this moves. Before continuing let's play whith our application and discover all that it contains. To close it we can push the X on the top right part. I'm in KDE, with the SuSe theme, as you could see in the forms, and it's possible that you have to close your window in another way.
Let's go for the most simple of the buttons: What must happen when the user pushes Exit? We must close the application. To introduce the Basic code that will be executed when the user pushes this button, we double click in the button with the text Exit (cmbExit). We see that Gambas generates some lines of code and that the cursor is set between them. Here is where the code must be introduced. This procedure will be executed when the user clicks on this button. To close the application we must execute Me.Close, so the code of this event will be:
PUBLIC SUB cmdSalir_Click()

  ME.Close

END
The next button we'll control is the Reset. In the same way: we double click on the button and in the code window that Gambas shows we must insert:
PUBLIC SUB cmdPonerSegundos_Click()

  fSegundos = txtSegundos.Text

  VerValores

END
To the point, it still seems that nothing happens. Our applicaction must be given some action. We are going to activate the Timer object located in the form from the beginning. To do so we have to set the interval to receive clock events. Either we do that from the code, in the previous event Form_Open, or we put in the form. Now we will do it in this way. In the form we click on the object Timer and in its property sheet we change its Delay value from 1000ms, to 100, to receive one event each tenth of second, which is going to be the precision of our stopwatch.
We still don't have the code that will be executed each time the clock wakes, and the way to activate it. To generate the code of the clock, nothing more simple, as always, than double clicking on the clock form. It will take us to the code window at the right position. After inserting our code it must look like:
PUBLIC SUB clkMiReloj_Timer()
  IF fSegundos < 0.1 THEN
    tglFuncionando.Value = FALSE
    tglFuncionando_Click
  ELSE
    fSegundos = fSegundos - 0.1
    VerValores
  END IF
END
And finally we activate at user's will the stopwatch with the toggle button, which is the one we still didn't manage. With a double click on the button we can insert the code for its event:
PUBLIC SUB tglFuncionando_Click()
  clkMiReloj.Enabled = tglFuncionando.Value
  VerActivarDesactivar
END
And we can already test our work.
Another Gambas' feature is the support for multiple languages. If you have been looking at the code you will notice that the strings are enclosed by brackets. This is to notify Gambas that they are going to be translated. The text of the form controls doesn't need these brackets. Our project has turned into something very useful, and people asks for the dialogs to appear in their language. Nothing more simple. We go to the Project / Properties menu of the project window.
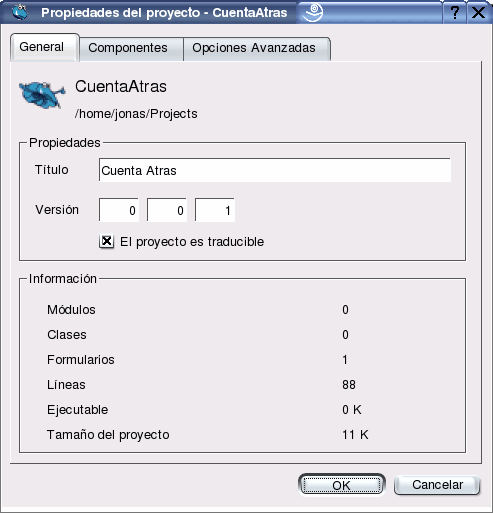
Here we set a Title to our project and activate the Project is translatable option which will allow to translate the dialogs. Now we have a new option active in the menus: Project / Translate. If we open the dialog, we can see that the translation is now very intuitive:
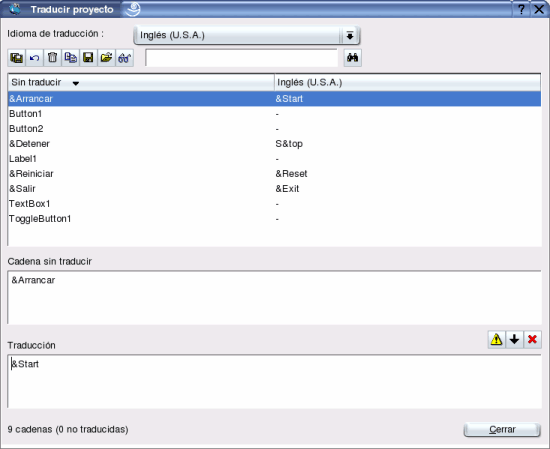
First we select the target language in the upper part. When we want to translate a string, we select it and fill the bottom part. Once all the strings are translated, we can test it launching the application from a terminal if before we set the LANG variable with the language of the translation. If I want to see how looks the translation to english, I close gambas and execute
$ LANG=en_US; gambas
To go back to the previous situation, I launch gambas from the KDE menu, just because here the environment variable isn't defined, it only lives in its console.
Although it is an interpreted language and we need to have all of Gambas installed, it is a good option to start to development of applications for the Linux desktop. As we have seen it is very simple and the development is very fast. It is enough for many day to day applications.
The onscreen help is quite complete, besides the available examples from the File/Open example menu. We can go to the project web too, in the links section there are many Basic projects that can be interesting. This is only the beginnig of a project that I foresee a very good future.
|
|
Webpages maintained by the LinuxFocus Editor team
© Jonás Alvarez, FDL LinuxFocus.org |
Translation information:
|
2004-03-13, generated by lfparser version 2.46