![[LinuxFocus Image]](../../common/January1998/border-short.jpg)
| News Archives |
OpenGL Programming: Simple Polygon Renderingby Miguel Angel Sepúlveda |
Introduction
Drawing Points
Drawing Lines and Polygons
Exercises
Next Time
IntroductionThis is the first article in a series on OpenGL, an industry standard for 2D/3D graphics (see also What is OpenGL). We will assume that the reader is familiar with his/hers C development platform, and has some knowledge of the GLUT library (otherwise just follow the "GLUT programming" series of articles in this magazine). Under Linux we recommend the usage of the Mesa-library which is a wonderful freeware implementation of OpenGL. Now there is even hardware support for Mesa (see 3Dfx graphics card). Every presentation of new OpenGL commands will be accompanied by an example that tries to exploit its functionality, at least we will try !. By the end of our series we will present you with the source code of a game simulation completely written in OpenGL. Before getting started I would like to mention that since I am a scientist, most of my experience with OpenGL is as a tool to write simulations of real quantum and classical systems. So my examples are a bit bias ;-). I hope readers find these examples accessible or at least amusing. If you would like to see other kinds of examples just let me know. OpenGL is often associated with 3D graphics, fancy special effects, complex models with realistic light modeling etc.. However it is also a 2D graphics rendering machine. This is important because there are many things you can learn to do in 2D before starting to learn about the complexities of 3D perspectives, model rendering, lights, camera position, etc.. A large number of engineering and science applications can be render in 2D. So let us first learn how to do some simple 2D animations. Drawing PointsOpenGL has only a few geometric primitives: points, lines, polygons. All of them are described in terms of their respective vertices. A vertex is characterized by 2 or 3 floating points, the Cartesian coordinates of the vertex, (x,y) in 2D and (x, y, z) in 3D. While Cartesian coordinates are the most common, in computer graphics there is also the homogeneous coordinate system in which every point is described by 4 floating points (x, y, z, w). We will come back to them after covering some elementary notions of 3D rendering. Since in OpenGL all geometric objects are eventually described as an ordered set of vertices, there is a family of routines to declare a vertex. Its syntax is: void glVertex{234}{sifd}[v](TYPE coords); Get familiar with this notation. The curly brackets indicate part of the name of the routine. The routines can take 2, 3 or 4 parameters in either short, long, float or double type. Optionally these parameters can be supplied in a vector form, in which case we would use the v-type routines. Here are some examples: void glVertex2s(1, 3);
float vector[3];
To simplify all these routines are refered to as glVertex*. OpenGL interprets any sequence of vertices according to its context.
The context is declared by the pair of routines glBegin(GLenum mode)
and glEnd(), any glVertex* statements executed
between the two are interpreted according to the value of mode,
for example:
draws 5 points in 2D with the coordinates specified. GL_POINTS is one of the labels defined in the OpenGL header file <GL/gl.h>. There are many other modes available but we will review then as necessary. Every point is drawn with the color currently stored in the OpenGL state
variable associated with the color buffer. To change the current color,
use the family of routines glColor*; there is a lot to
say about selecting and manipulating colors (there will be another article
only on this subject). For the moment, we will be using three floating
point numbers from 0.0 to 1.0 - this is the RGB (Red-Green-Blue) encoding;
This is already enough material to write our first two examples of code. The first example is a simple OpenGL program that draws a number of orbits in a chaotic map (The standard map). If the reader is not familiar with mappings and the standard map in particular, it does not matter. To put it simply, a map takes a point and generates a new one using a well defined formula: yn+1 = yn + K sin(xn)
In the case of the standard map it represents a model for the trace left by a charged particle that circles around the tori of an accelerator of particles and crosses a section plane of the accelerator. Studying the properties of this and other maps is important in physics because it helps us understand the stability of the charged particle confined in the cyclotron. The standard map is very cool because for some values of its parameter, K clearly shows a mixture of chaotic and trapped motion. Finally even those who are not really interested in physics but still want to develop some nice graphics code should pay some attention to maps and their properties, many of the algorithms for generating textures, fire flares, trees, terrain, etc.. are based on fractal maps. Here is the code example1.c:
#include <GL/glut.h>
#include <math.h>

const  double pi2 = 6.28318530718;

void NonlinearMap(double *x, double *y){
    static double K = 1.04295;
    *y += K * sin(*x);
    *x += *y;
    *x = fmod(*x, pi2);
    if (*x < 0.0) *x += pi2;
};

void winInit(){
    /* Set system of coordinates */
    gluOrtho2D(0.0, pi2, 0.0, pi2);
};

void display(void){
    const int    NumberSteps = 1000;
    const int    NumberOrbits = 100;
    const double Delta_x = pi2/(NumberOrbits-1);
    int step, orbit;

    glColor3f(0.0, 0.0, 0.0);
    glClear(GL_COLOR_BUFFER_BIT);
    glColor3f(1.0, 1.0, 1.0);

    for (orbit = 0; orbit < NumberOrbits; orbit++){
      double x, y;
      y = 3.1415;
      x = Delta_x * orbit;

      glBegin(GL_POINTS);
      for (step = 0; step < NumberSteps; step++){
        NonlinearMap(&x, &y);
        glVertex2f(x, y);
      };

      glEnd();
    };

    for (orbit = 0; orbit < NumberOrbits; orbit++){
      double x, y;
      x = 3.1415;
        y = Delta_x * orbit;

        glBegin(GL_POINTS);
        for (step = 0; step < NumberSteps; step++){
          NonlinearMap(&x, &y);
          glVertex2f(x, y);
        };
        glEnd();

     };
};

int main(int argc, char **argv) {
  glutInit(&argc, argv);
  glutInitDisplayMode(GLUT_SINGLE | GLUT_RGBA);
  glutInitWindowPosition(5,5);
  glutInitWindowSize(300,300);
  glutCreateWindow("Standard Map");

  winInit();
  glutDisplayFunc(display);
  glutMainLoop();

  return 0;
}
Please read the Programming
GLUT article to understand the glut* routines, most of this code came
from there. The graphics window is opened in single buffer and RGB mode.
Then a callback function named display() draws
the map: first we select the color black for the background; glClear(GL_COLOR_BUFFER_BIT)
resets the color buffer to the current color (black), next after selecting
white color with glColor, we run the NonlinearMap()
a number of times and plot the points with glVertex* in GL_POINTS
mode. Really simple.
Notice that in the window initialization routine winInit()
there is a single statement from the OpenGL Utility toolkit, gluOrtho2D().
This routine sets a 2D orthogonal system of coordinates. The parameters
passed are "minimum x, maximum x, minimum y, maximum y".
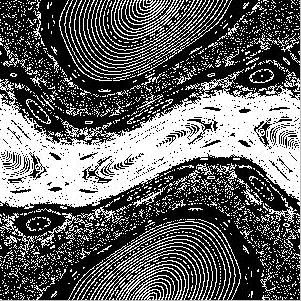
After running example1 you should see this image:
Let's go now to the second program, example2.c:
Another difference worth noticing is the use of glutSwapBuffers()
at the end of display(). The window was initialized in double buffer
mode, therefore all the rendering directives are applied to the hidden
buffer; the user cannot see the image being draw in this case. After the
whole image (frame) has been finished then it is made visible by switching
hidden and visible buffers with glutSwapBuffers(). Without this
technique the animation will not run smoothly.
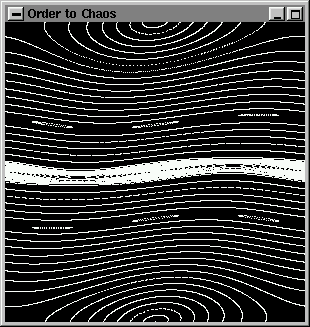
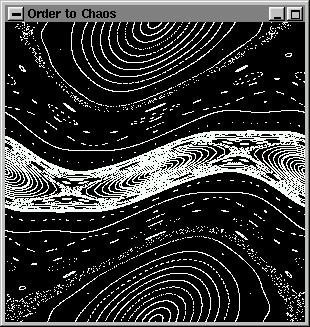
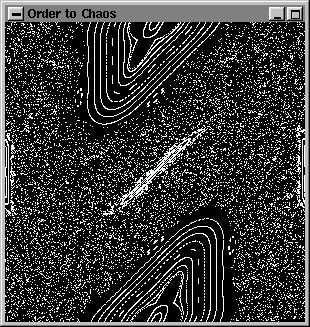
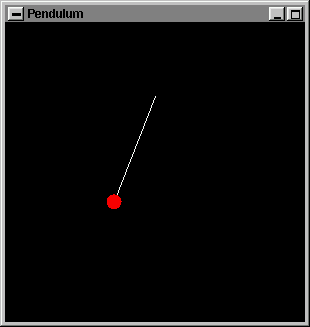
Here are some of the frames displayed during the animation:
IMPORTANT: The display() callback function always
gets invoked at least once, before idle(). Keep this in mind when writing
your animations and deciding what goes to display() and what to idle().
As previously mentioned glBegin(GLenum mode) accepts various
modes and the sequence of vertices v0, v1,v2,
v3,v4,... vn-1 declared afterwards are
interpreted accordingly. The possible values for mode and the actions taken
are:
As before there is an idle() callback function whose aim here
is to keep the clock running (updating the variable time). The display()
draws two objects; the pendulum cord and weight (in white and red respectively).
The motion of the pendulum coordinates is implicit in the formulas for
xcenter and ycenter:
Here are some suggestions for practicing what you have learned so far:
This is all for now. There are still many things to discuss about polygons.
In the next issue (March 1998) we will continue to explore polygons, modeling
and cover in more detail some of the commands your are already familiar
with.
|
- Read Hardware Review: 3Dfx Graphics Card.
- Consult http://www.opengl.org/.
- Read other articles by the same author:What is OpenGL?, GLUT Programming: Windows and Animations.
This website is mantained by Miguel A Sepulveda.